miniThrottle, a DCC-Ex and WiThrottle throttle
miniThrottle: A model railroad WiFi throttle.
Features
MiniThrottle is a wireless (WiFi, for DCC-Ex or WiThrottle) or serially connected (DCC-Ex) model train throttle. WiThrottle is a protocol supported by JMRI and some hardware such as Digitrax LNWI.
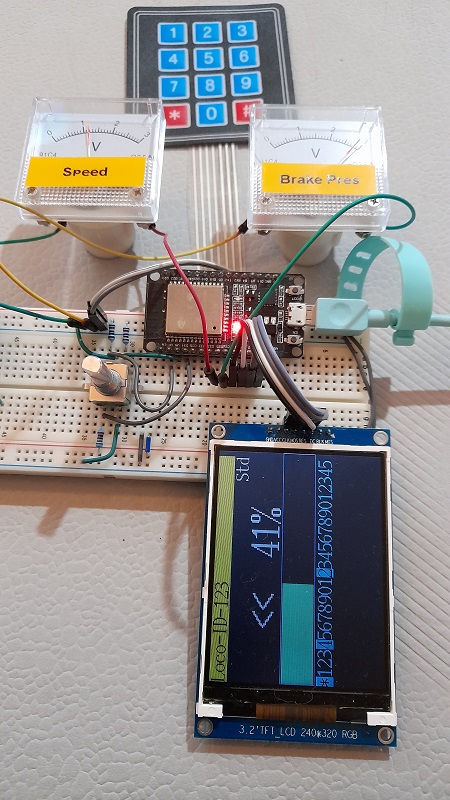
- Open source software free for hobbyist use, but a financial contribution would be appreciated if used commercially.
- esp32 based It uses a common, but powerful micro controller as its core, different modules are available which minimise the project component count.
- Station or Access Point (Hotspot) modes for WiFi connectivity. Station mode is usually a good option for standalone throttles, while Access Point mode is often a good choice if acting as a DCC-Ex relay. If using as a simple throttle, then after initial configuration, you can turn off Access Point and operate in Station mode only.
- Multi-protocol Two protocols are supported:
- WiThrottle (WiFi Only)
- DCC-Ex (WiFi or serial)
- Multi-optioned feedback These include:
- different displays
- LED status indicators
- 3v voltmeter for speedometer and brake pressure
- Multi-optioned input These include:
- different keypads
- Rotary Encoder
- Forward/reverse switch
- Throttle potentiometer
- Serial/Web console allows wifi network affinity and other settings to be changed without having to re-program the micro controller
- Multiple WiFi networks allowing the throttle to be portable and used on multiple layouts. Alternatively a direct serial connection to DCC-Ex may be used, which bypasses WiFi connectivity.
- Menu driven user interface makes it easy for visitors or occasional users to use
- Programmable Automation scripts allow an additional degree of customisation from version 0.7e and later
- Relay A serially connected miniThrottle can optionally relay either DCC-Ex or WiThrottle WiFi throttles to its serially connected control station. Potentially, this can reduce the cost of setting up DCC trains by avoiding the need for a computer or separate WiFi access points for a layout. Each relayed connection controls separate trains.

The project is in a sense "incomplete". Many final design decisions are left to the constructor. This allows the builder for example to:
- Customise a throttle to suit a particular user, eg someone with a disability.
- Build handheld and panel mount throttles with different features, but which share the same "operating manual".
See Builders Notes page for some build suggestions.
Comments
- miniThrottle uses the expression "turnouts" in preference to either "points" or "switches". The intention is to avoid ambiguity: Points may refer to a location on a cartesian plain or a location in program code. Switches too could refer to an electrical switch or a programming construct.
- Can miniThrottle control multiple locos? Yes, as an in-throttle-consist, eg a train with 2 or more locomotives pulling it. Once you selected your first locomotive there is a cab menu that will allow you to select another. But no, not as independent trains. If you want to control separate trains use separate controllers, they should be easy and cheap enough to build.
- How big can my inventory be? The menu system will probably get unweildly to use with more than 20 locos in it, but that depends on how impatient you are in selecting options. I developed miniThrottle with my own small layout in mind, and present it here for others to use. In testing the system has not been brought to maximum values, but in theory the miniThrottle could store:
- 118 named locomotives + 8 by address only
- 126 turnouts
- 126 routes
- 8 concurrent network connections, eg: 3 web, 1 diagnostic and 4 relay connections
- Can you build one for me? No. Please don't ask. I do this for a hobby not a commercial enterprise.
A word about serial connectivity
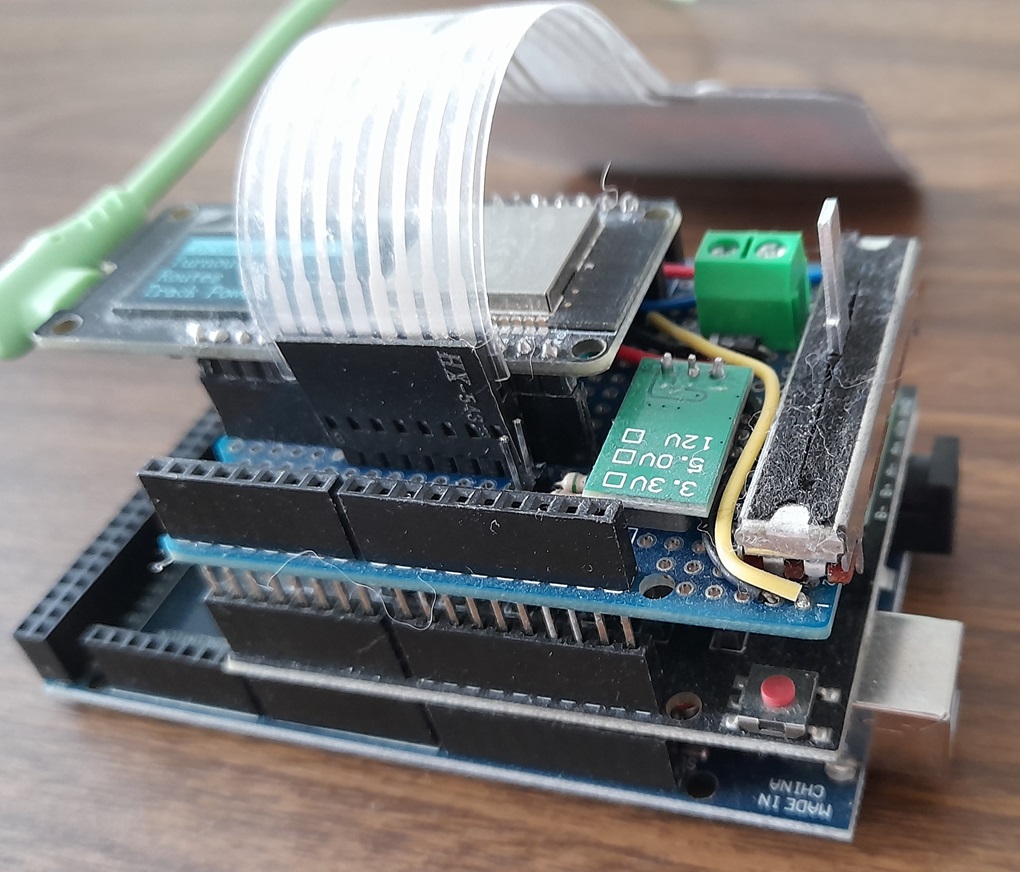
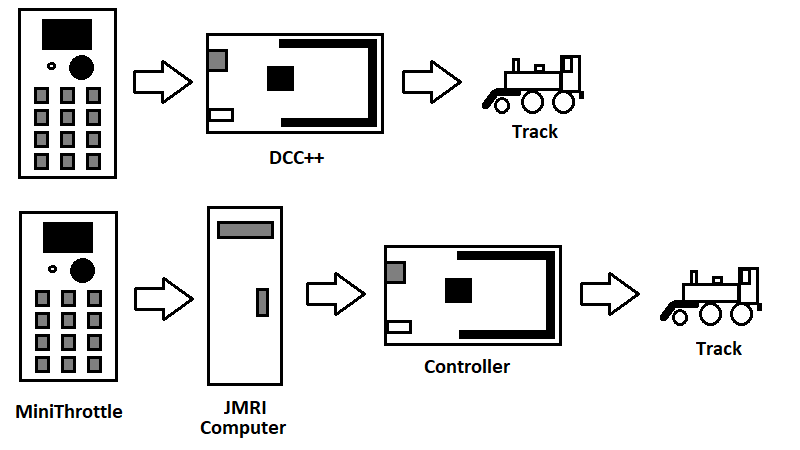
MiniThrottle can connect directly to a DCC-Ex controller using either DCC-Ex or WiThrottle protocols. Or it can connect to JMRI using WiThrottle protocol. If connecting to DCC-Ex, the DCC-Ex unit should have a suitable WiFi interface configured OR allow miniThrottle to access DCC-Ex via serial connection.
For example a miniThrottle could be "stacked" on top of a Mega 2560 and motor shield - directly accessing the serial port. And when running as a relay that may give an adequate control system for a small layout. By using DCC-Ex protocol rather than WiThrottle allows miniThrottle to access the programming track and have internally defined locomotive rosters and turnouts.
miniThrottle optionally allows multiple WiThrottle connections to be relayed to DCC-Ex if it is connected to Dcc-Ex via a serial connection. For some small layouts or builders new to DCC that may provide sufficient "Control Station" functionality without the requirement of adding computers or network switches and access points.
While the original intent of miniThrottle was simply to act as a WiThrottle device, it can be connected to DCC-Ex as a relay. How does a miniThrottle relay compare against a WiFi module on DCC-Ex? The table below should help.
Note this only compares the WiFi module, other options such as Ethernet or JMRI fill different roles. If the relay cannot support as many connections, locomotives, turnouts etc as you would like, then upgrade to JMRI running on a computer!
| Esp8266 WiFi Module | miniThrottle |
|---|---|
| Supported by DCC-Ex project | Not part of DCC-Ex - don't ask them for help. |
| Many users - lots of people can help if you have problems | Few users - you are your own first line of problem solving |
| Tried and tested option | New software and first iteration |
| Up to 4 WiFi throttles | up to 8 WiFi throttles + 1 in-built control |
| DCC-Ex handles all WiFi traffic | Some traffic such as keep alive packets offloaded to miniThrottle |
| DCC-Ex needs to be compiled with WiFi support | No WiFi config required on DCC-Ex - connect to serial port |
| Relatively inflexible WiFi config | More WiFi config otions at runtime |
| Compiler/command line configuration | Web/command line configuration |
| No local controls | Optionally can include a local/built-in throttle |
Putting it together
If you are not using a precompiled version, you will need to decide what options you want to include in your build. There are two main parts to this:
- Download and compile - this will allow to select the features and hardware support you want.
- Hardware selection - miniThrottle allows its builders to select from varios displays, keypads, switches and LEDs to customise your build.
Once assembled, there are 2 main ways of further customising and setting up your miniThrottle:
- Serial Interface - Uses a USB serial connection at 115200 bits for configuration and advanced diagnostics.
- Web Interface - More user friendly web configuraion, with some basic diagnostics.
Once assembled it is likely you may need some further diagnostics to check keypad mapping or what data is sent to the control station. The Troubleshooting section may give you some help in how to do this.
Using the MiniThrottle
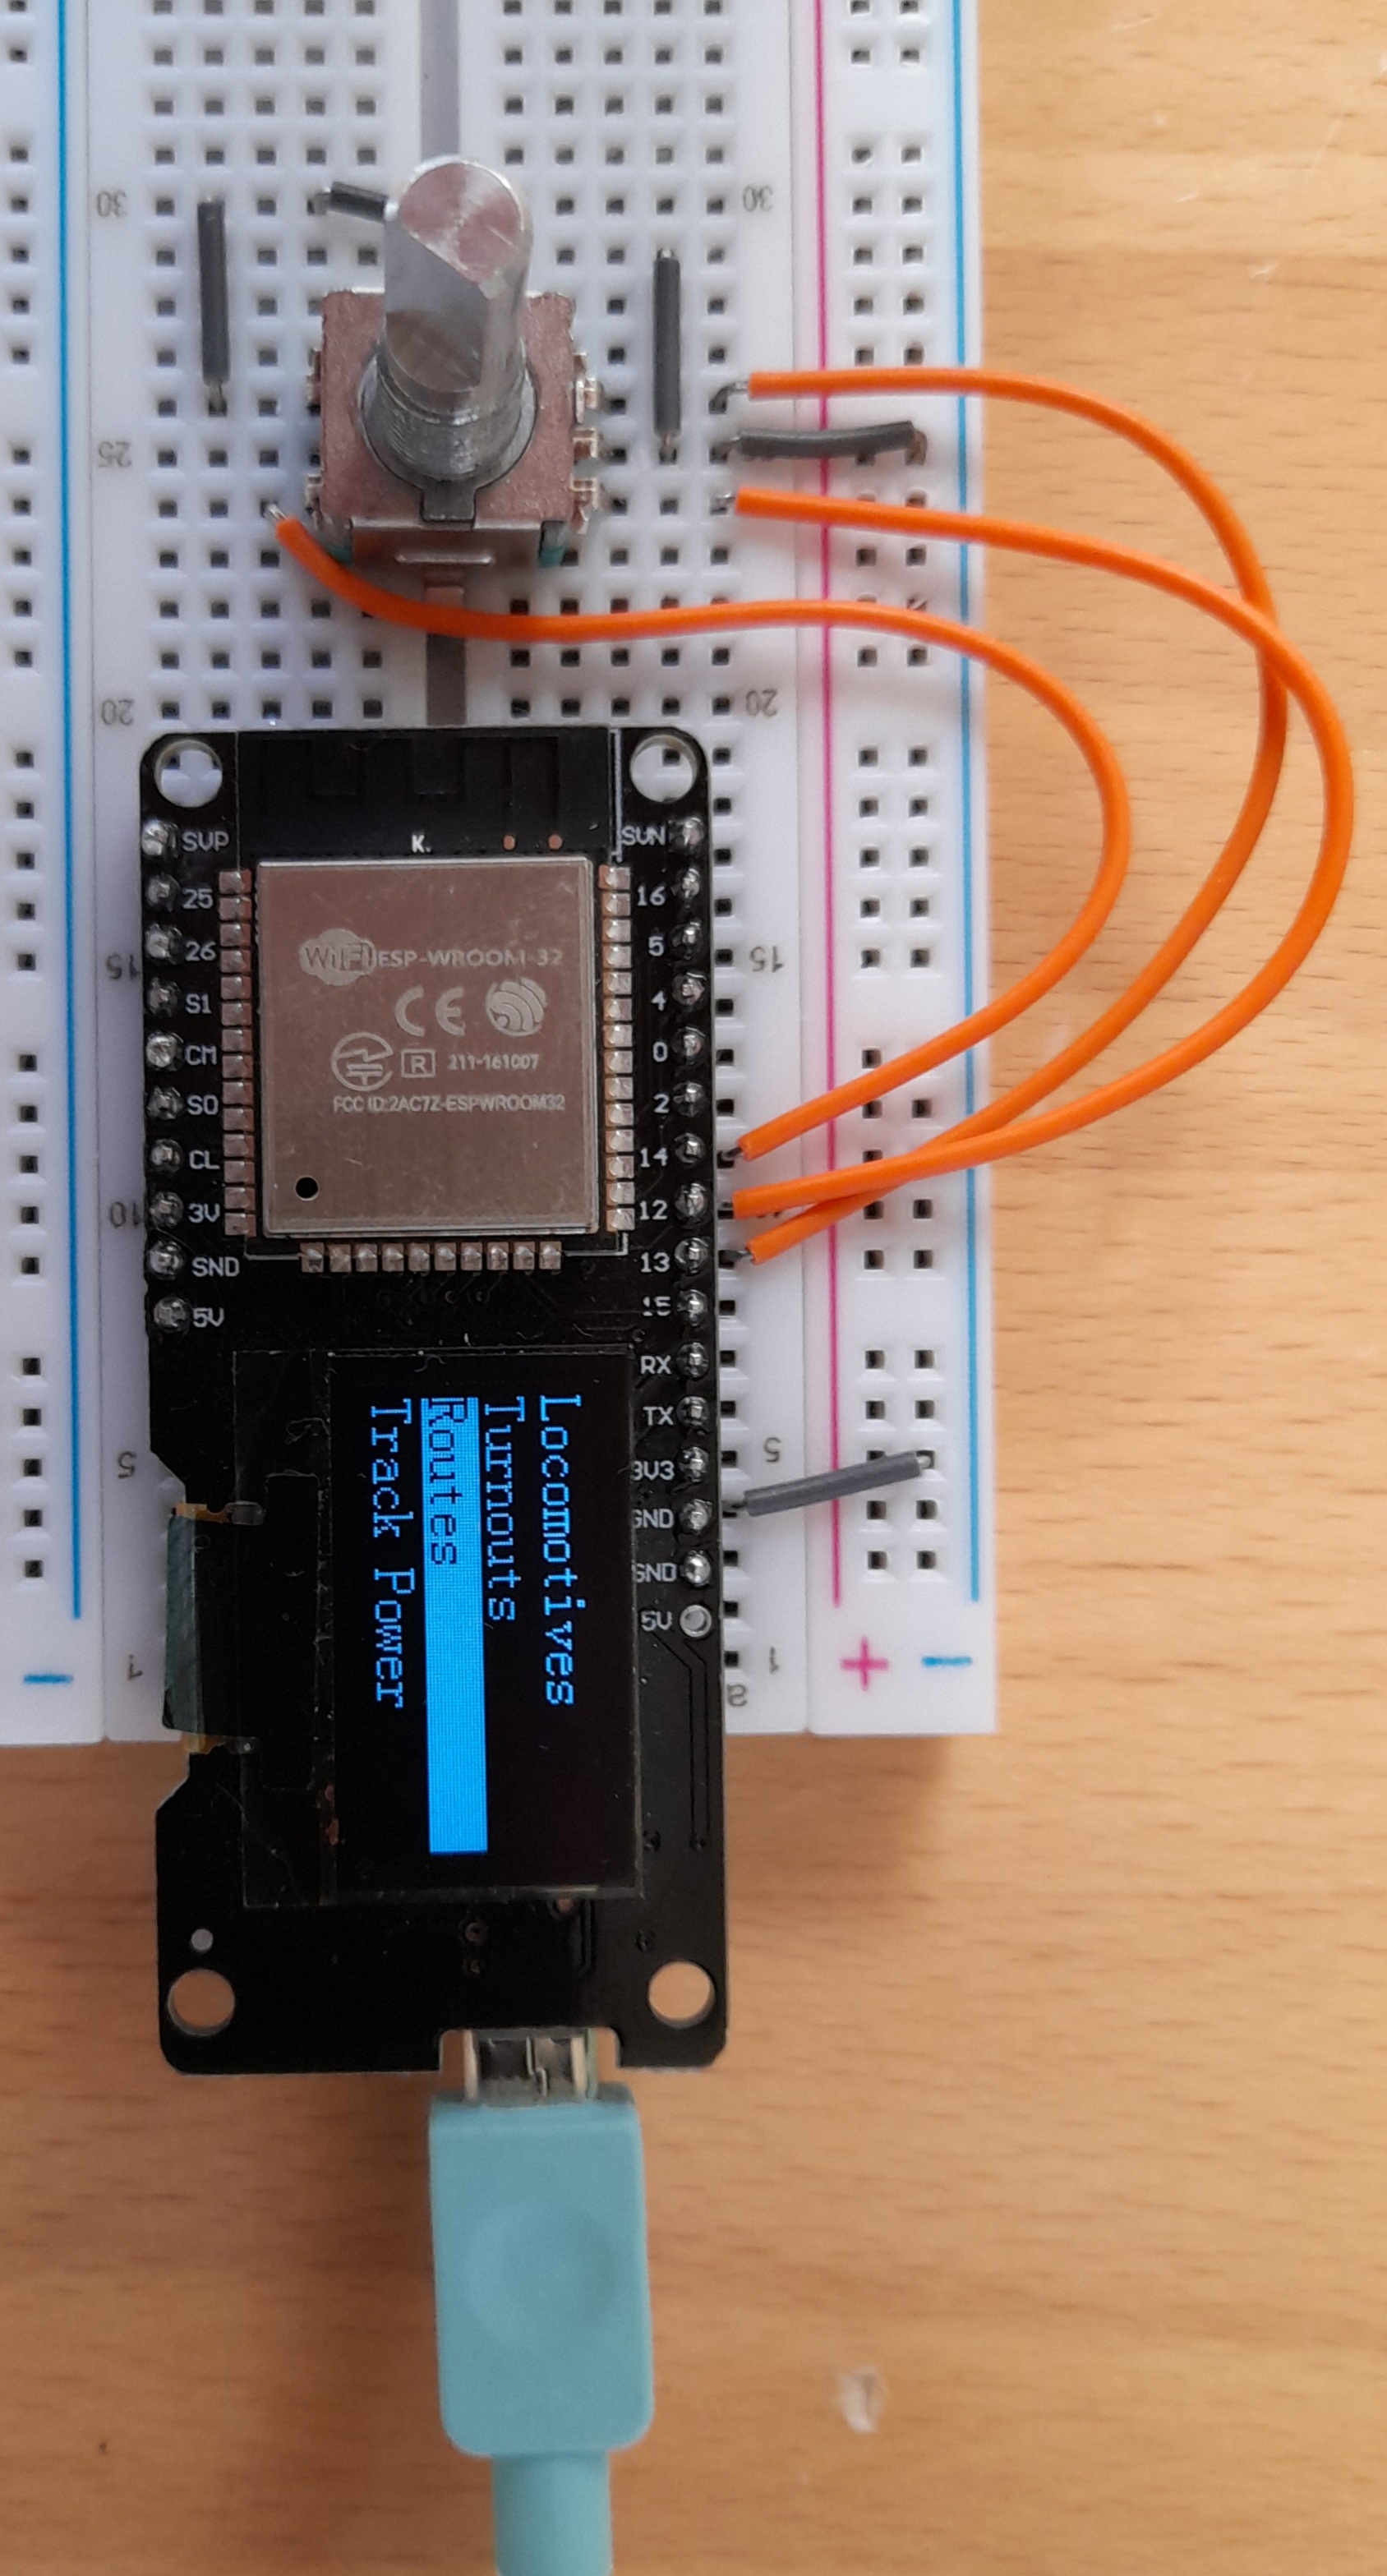
After power on the MiniThrottle searches for a WiFi network and server to join. Pressing a keypad key during this time will take you to the same configuration menu as can be accessed when the MiniThrottle is running. Once connected the control station is given a few seconds to respond and identify itself. If no identification is received the the default protocol is selected. At which point the main menu is displayed.
Main Menu
The default is to only show valid options in menus. As a result until track power is applied, the option to select a locomotive is not displayed. If track power is applied and the option is not displayed, a "previous menu" button or encoder-back will refresh the menu for you. "CV Programming" will only work if using DCC-Ex protocol.
Locomotives
Turnouts
Routes
Track Power
CV Programming
Configuration
Locomotives
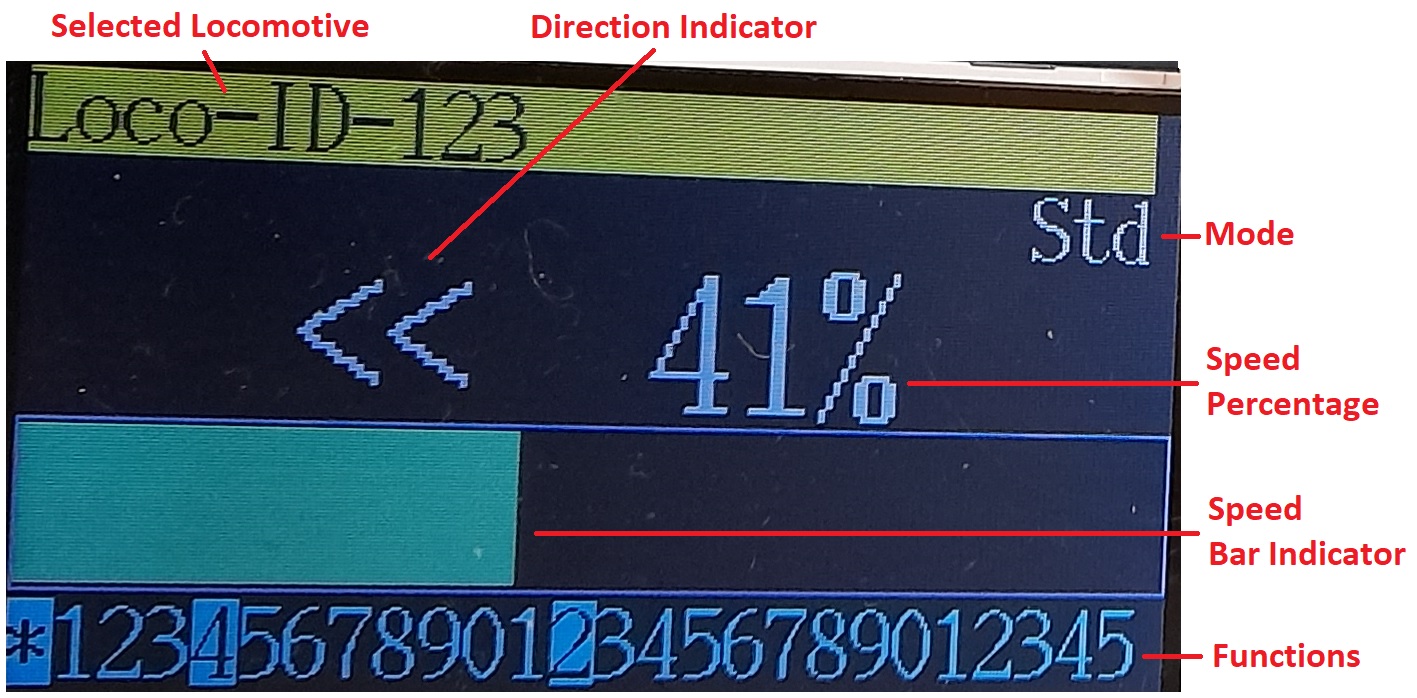
This presents a menu where locomotives can be either selected from the roster or controlled by their ID number. Once a locomotive has been selected, a display like that shown on the right will display, where direction, speed and functions are displayed.
When driving pressing the "#" key will take you to a "Cab Control Menu". The add and remove loco options allow the same commands to be sent to multiple locomotives at the same time without using advanced consisting.
NB: The Cab menu can only be accessed if the locomotive has stopped. The first locomotive selected can only be removed if it is the only, or last remaining, locomotive selected.
This Cab menu has the following options:
Add Loco
Remove Loco
Turnouts
Routes
Return
Turnouts
This menu is used to select a turnout by name and set it either Closed or Thrown.
Routes
This menu allows a route to be selected. It allows a particular sequence of turnouts to be set.
CV Programming
This is only operates with DCC-Ex protocol. If using WiThrottle, it is expected that the JMRI computer will be able to program locomotive CVs. This option allows locomotives to be configured with a very simple mix of miniThrottle and DCC-Ex only.
Read Loco Addr
Read CV Byte
Write Loco Addr
Write CV Byte
Write CV Bit
Prev. Menu
Configuration
Bidirectional Mode
CPU Speed
Font
Info
Protocol
Restart
Rotate Screen
Server IP
Server Port
Speed Step
Prev. Menu
Operational Modes
When driving locomotives there are 2 modes of operation, best summarised as follows:
| Hardware | Standard Mode | Bidirectional Mode |
|---|---|---|
| Encoder | Rotating anti-clockwise reduces speed to 0%. Rotating clockwise increases speed upto 100%. | Rotating anti-clockwise reduces forward speed or increases reverse speed. Rotataing clocwise reduces reverse speed or increases forward speed. |
| Keypad | Down button reduces speed to 0%. Up button increases speed upto 100%. | Down button reduces forward speed or increases reverse speed. Up button reduces reverse speed or increases forward speed. |
| Potentiometer | Moved to one side reduces speed to 0%. Moved to the opposite side increases speed upto 100%. | Center postion is idle. Moved to either extreme is full throttle in the respective direction. |
Note: if including a potentiometer in your build, it is recommended that a "P" button is configured on your keyboard (if using one). This allows the potentiometer to be enabled or disabled, so that it does not over ride any speed / direction settings set from keypad or encoder.
| Thank you for visiting camelthorn.cloud | Home |